Thursday, July 23, 2020

Mushrooms

I am continuing the Forest Floor pieces I wrote about last week. But I have decided not to do them in hand embroidery. It takes about two weeks of stitching, hours each day and I would never finish nine of them by September. So I went back to my usual mode of enhancing the photos printed onto fabric with machine free-motion quilting and embellishments. I can make one in a few hours, depending on the amount of stitching and embellishing.


On the three above I did free-motion satin stitching on all the mushrooms dots. I used three different stabilizers and the one that worked the best and gave me no distortion was Ultra Solvy Extremely Stable Water Soluble Stabilizer.


What you can't tell by the photos is that I put a piece of wool batting behind each mushroom head to give it some three-dimensionality. I cut the excess away and then fused it to a piece of Peltex. I did some free-motion quilting on the backgrounds and then added my embellishments.....real ground moss, tree lichen, tree bark and dyed Spanish moss. 

I will use the hand embroidered piece I showed last week as the center of the nine pieces. They are each seven inches square. Click on each picture for more detail.

I am linking up with Off the Wall Friday.

Saturday, July 18, 2020

Slow Stitchng

Every year my weekly fiber group, FiberWorks, puts on a show at the local library. For the past few years our work has been mounted on 30 x 30" black canvases, which gives the show a nice cohesive look. This year the theme for the show is "A Walk in the Woods". We don't even know if the library will be open in Sept, when the show should be mounted, but we decided to go ahead and make our pieces, even it they are only shown on line.

Our pieces can be any size, as long as they fit onto the canvas and you can do as many pieces as you want.

My son is an avid hiker in the Pacific Northwest, where he lives. He is also a mushroom hunter and has sent me some incredible pictures. I decided to do 9 small pieces, each 7" x 7" and mount them evenly spaced onto the canvas. I think I will call it Forest Floor.

I did some small pieces last year that were photos printed onto fabric and enhanced with hand embroidery and that's what I thought I would do with these. I finished my first one this week and am working on my second. They are taking FOREVER and now I think the rest of them will be finished with free motion quilting, as I have done successfully on my Garden Studies


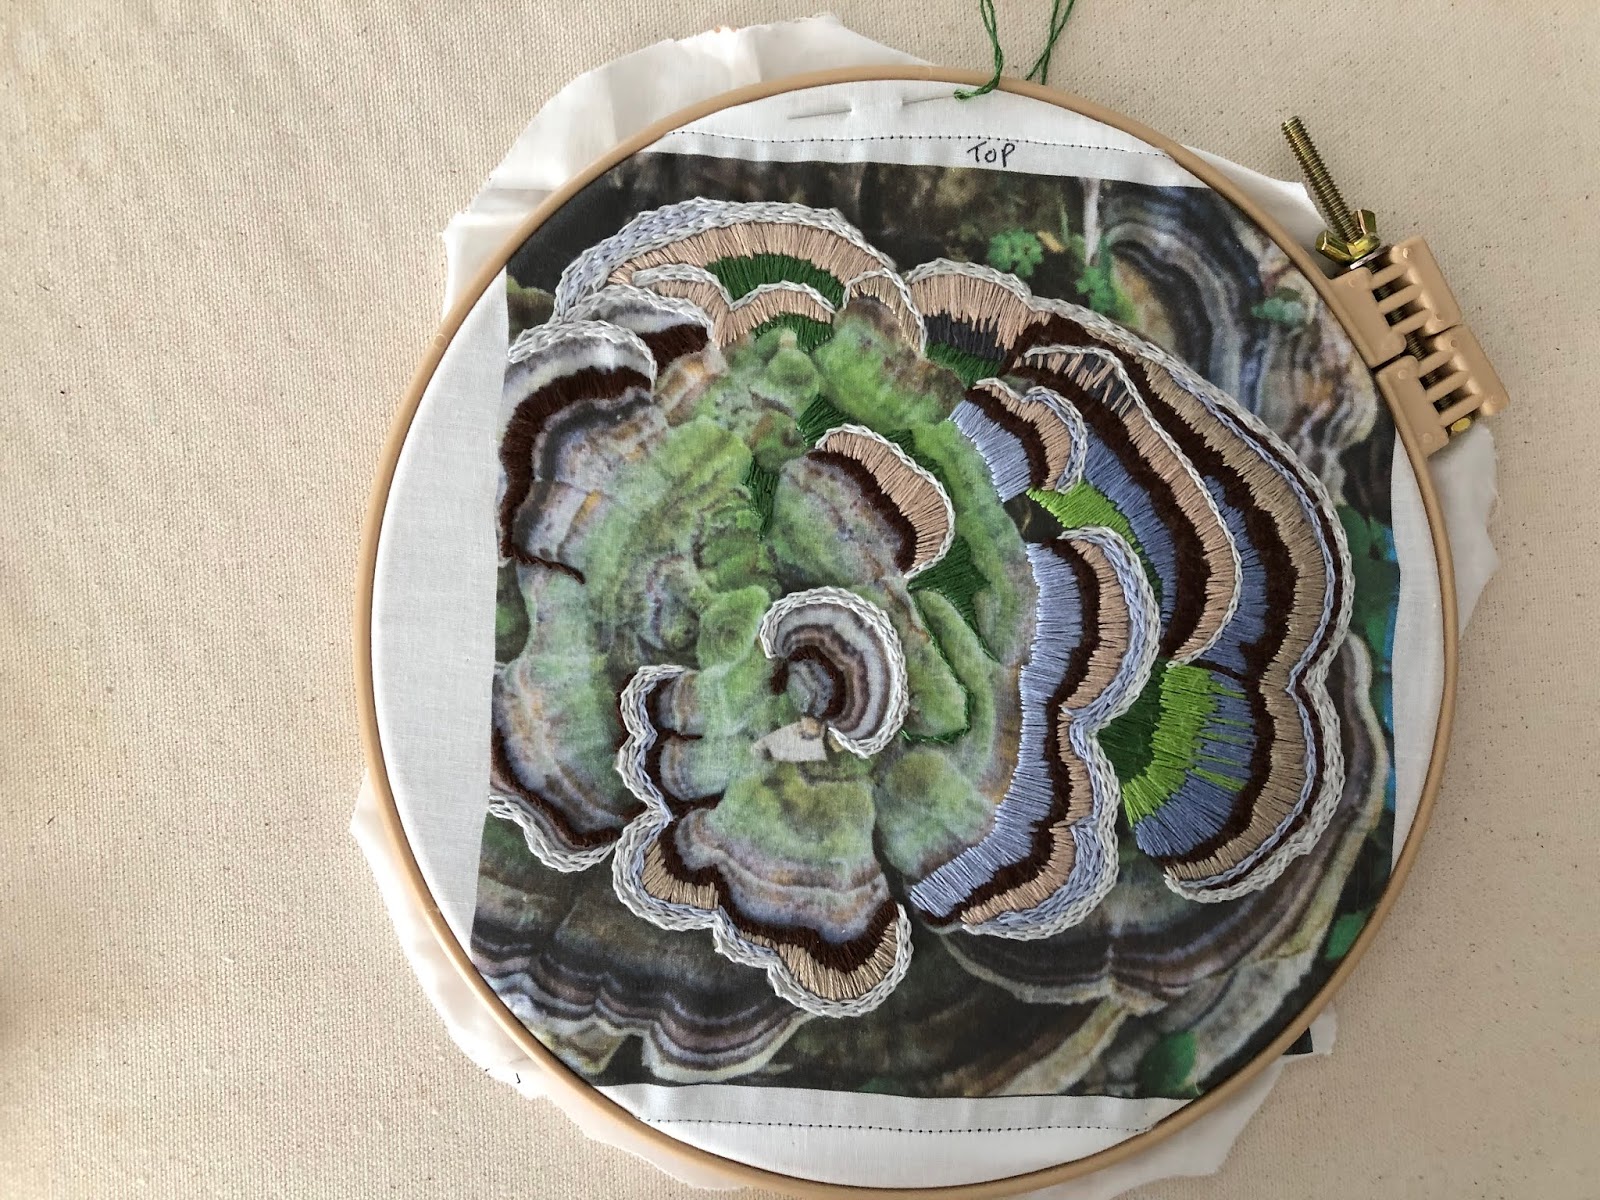
Here is #1. This is a tree fungus. I never knew that they came in such incredible colors.

My embellishments are real tree lichen, dyed Spanish moss and a bit of roving.


I only used chain stitching  on this one. Very time consuming.


On this second one, also a tree fungus, I am doing a combination of chain stitching and satin stitch. Also very labor intensive .


If you do any hand embroidery, I highly recommend  these non-slip hoops that I found online. A little pricey, but oh so worth it. Your fabric will stay as tight as a drum all the while you stitch and no constant tugging.

I am linking up with Off the Wall Friday.


Thursday, July 2, 2020

Art on Masks

I got an email the other day directing me to a website that literally had millions (no exaggeration) of masks that featured reproduced art by many artists, some water colors, some photography, and other types of art. So it got me to thinking if I could use my art on a mask.

A few years ago I was making a lot of what I called "Garden Studies". I took photographs that I had taken, mostly in my garden, put a filter on them in Photoshop Elements, printed them on fabric and  heavily free-motion quilted them and then mounted them on canvas. They were very popular and I sold a lot at a solo show I had a few years ago and some after that. I haven't made any in awhile. If you go to the Garden Studies page at the top of my blog you can see some more.


While straightening up my studio the other day I can across a Rudbeckia print that I had never quilted. It still had its freezer paper backing on it and I thought it would make a pretty mask.


I used the pattern for the Olsen mask, with modifications. I had to add strips of bright yellow fabric to the sides because the pattern was too big for the fabric. I made elastic ear loops with beads, to make it adjustable. I made a tuck on each side near the ears and two under the chin for a nice tight fit.

I now have quite a wardrobe of masks for myself. I only wear them for one day and then hand wash them. I try to match the colors to whatever I am wearing that day. So little going on in my life these days other than trips to the grocery store, drug store, doctor visits, etc. So this gives me a little perk- up.

I will be linking upwith Off the Wall Friday.