Thursday, September 24, 2020

Playing With Paper and a Collage

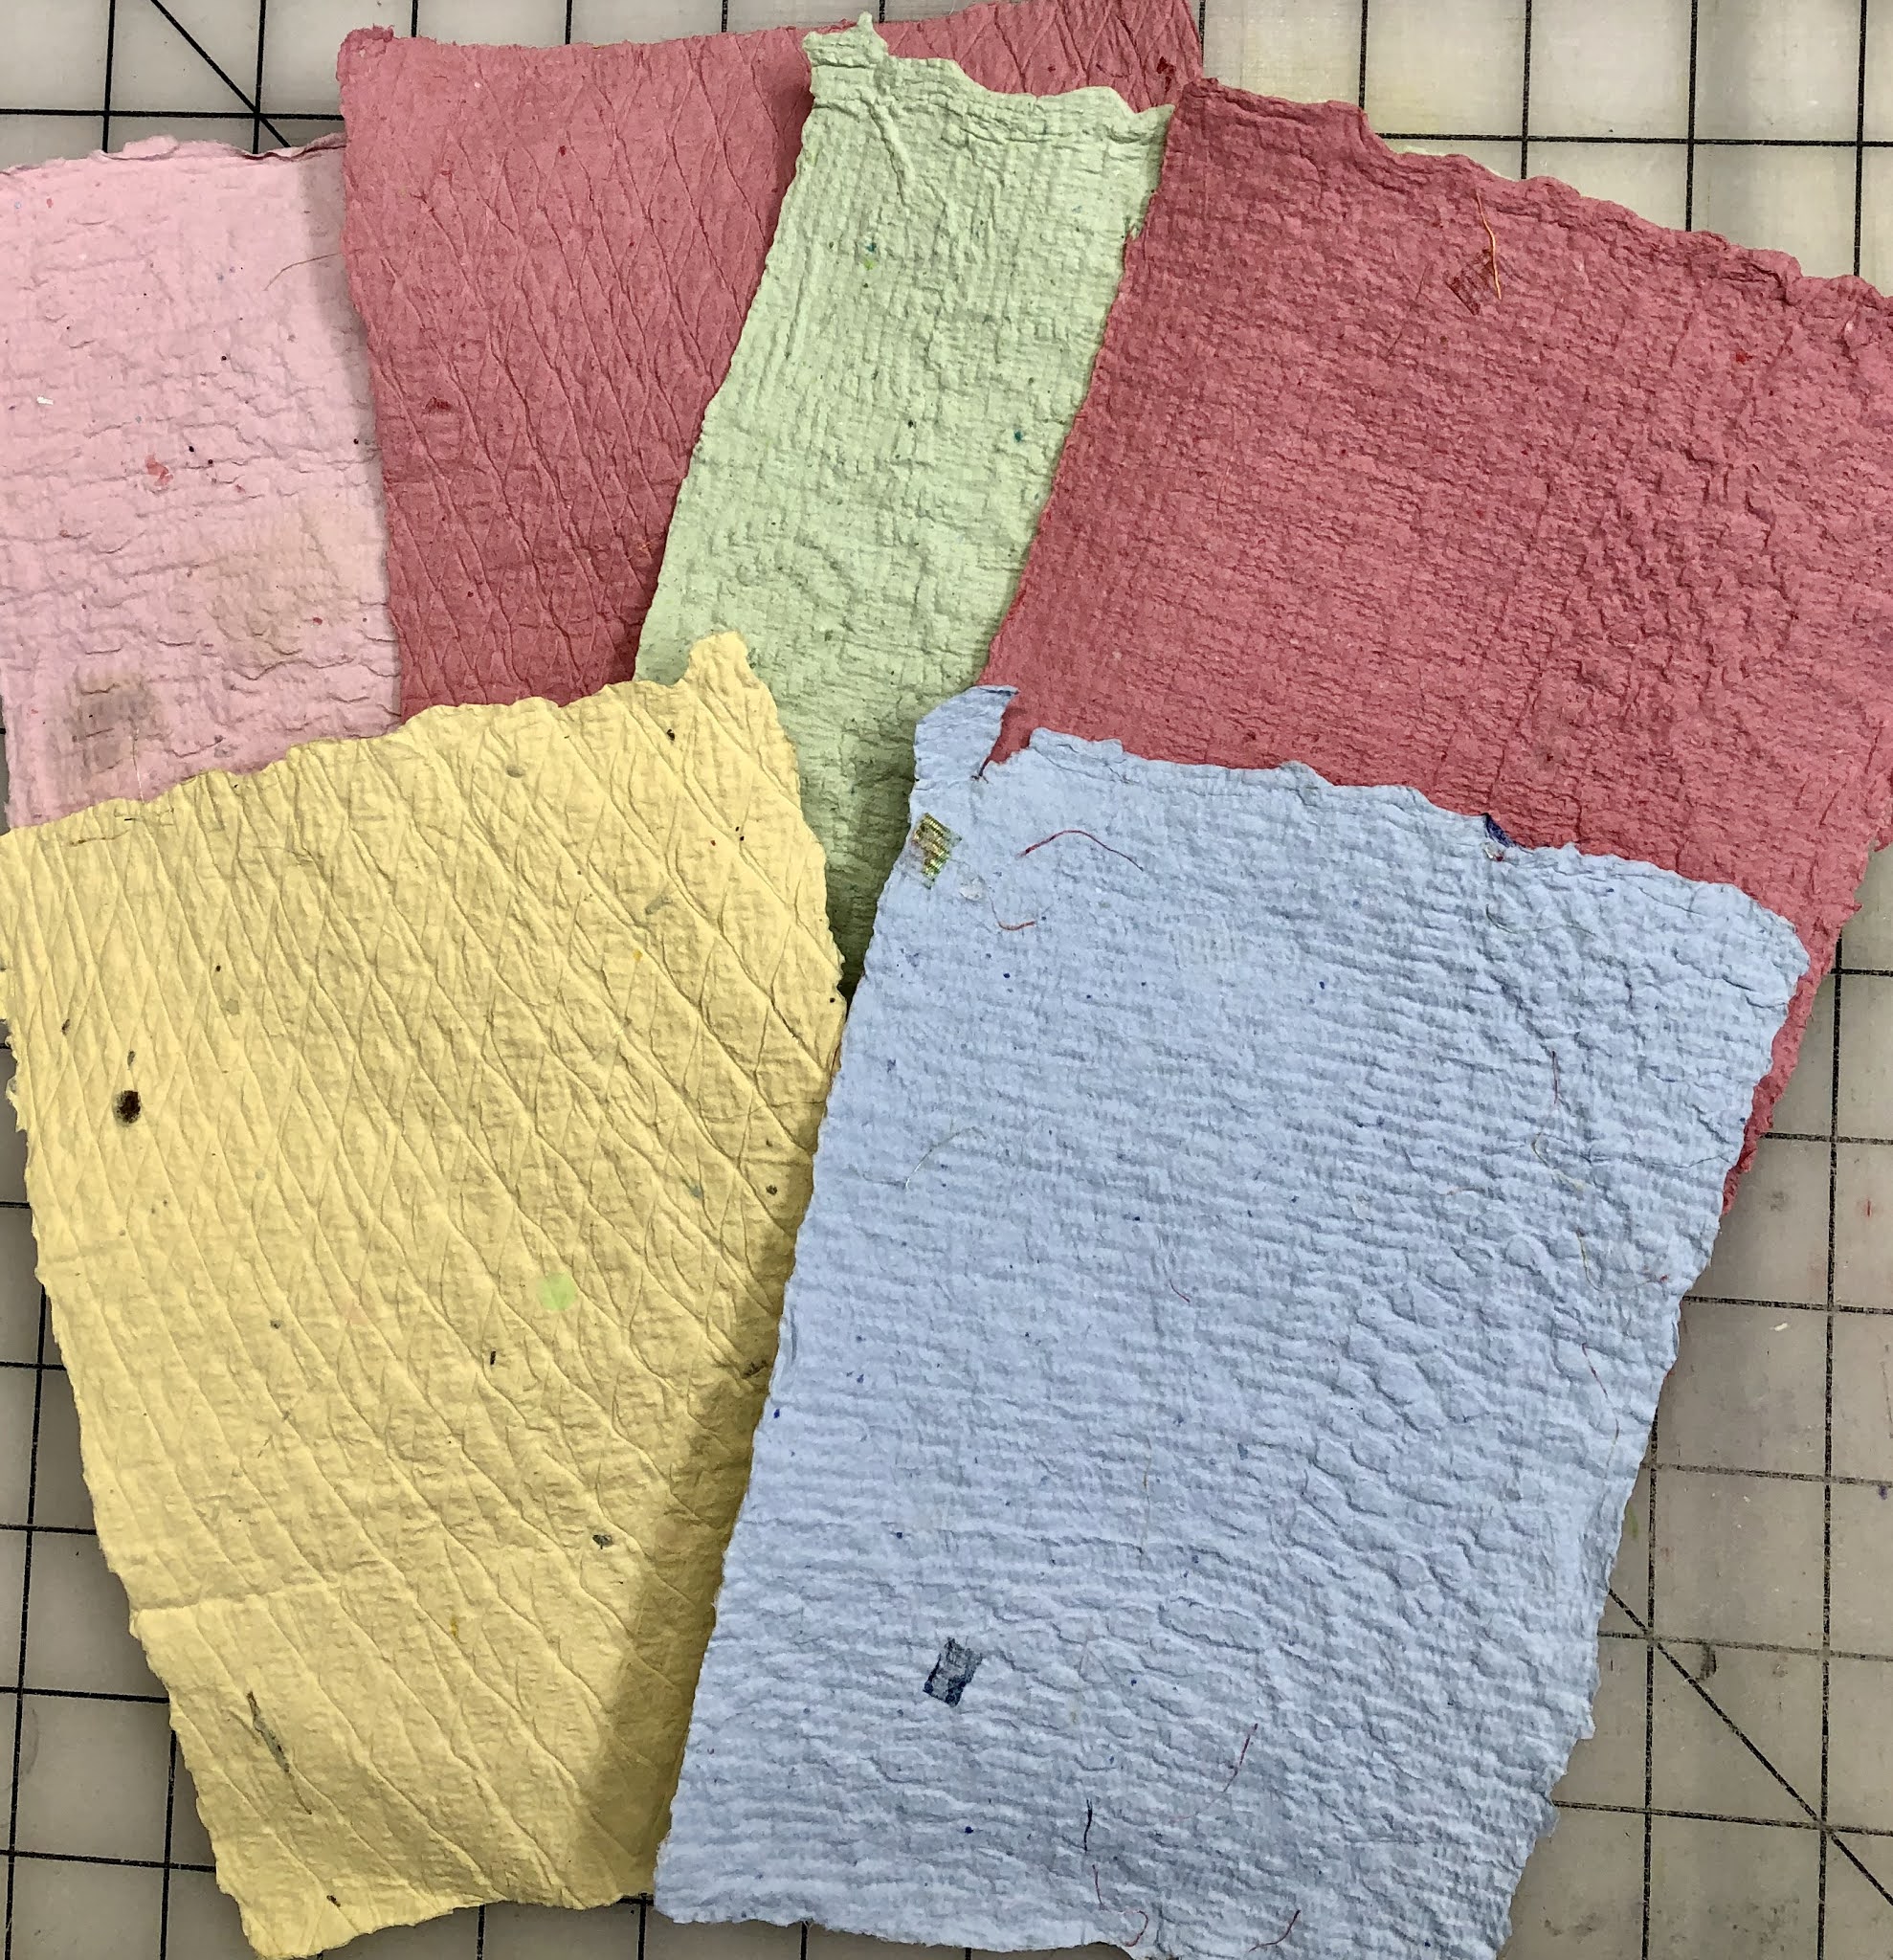
My friend, Beth, a member of my FiberWorks group, made a lot of handmade paper recently and generously gave out zip-lock bags full at our last and only in-person meeting a couple of weeks ago. I was thrilled to be a recipient and am combining them with some of my paper techniques.

We haven't met for the last two weeks because of weather so we Zoomed instead, as we had all summer. The weather promises to be perfect tomorrow and we will meet again in Myra's yard, socially distanced and masked. We so enjoyed our last meeting. Show and Tell is just not the same on Zoom.


For this first one I adhered the hand made paper to a rust colored card base after tearing it down slightly to fit. Then I adhered my paper which was made using heavy weight Bristol paper and Distress Inks, using the "smoosh method" I smeared some ink onto my craft pad, spritzed it with water then laid  my paper on top and pressed down. Dried with my heat gun and repeated with new or the same colors. After I had all the colors I wanted I used a stencil and more Distress Inks to get those tiny circles. Then I stamped the daisy design with VersaMark and used black embossing powder. Heat set that to get a glossy look.  Last step was to go around the paper with a buttonhole stitch on my Bernina.


Same techniques as the one above, except instead of using a stencil, I splattered some diluted ink onto the paper as a last step. Hard to tell from the photo, but instead of stamping the tree in black, I used navy blue, which I thought was not as harsh.


This one is a little different. Again I applied some Distress Ink onto my craft pad and picked it up with a brayer, blue one way and yellow the other, then used parts of three different stencils. The dandelions are a die cut, giving a little more dimension. If I do this again I think I will cut the flowers out of a darker color. 

I still have a stack of Beth's papers and hope to make some more of these. I am not putting a sentiment on the front of these cards because then I can use them for any occasion and perhaps someone might want to frame them. Thank you, Beth!


The prompt for this month's collage was Tree and I used my usual "formula" with pages torn from an old encyclopedia, 2 unabridged dictionaries and the online dictionary. Again I printed my images onto tracing paper so that you could read the text beneath it. I had quite a bit of that dark green velvet that you see in the upper left hand corner. It is a double shot velvet, meaning that is is woven using red and green threads. If you look at it from one angle it looks red, the other angle, green. For some reason I thought it would emboss red and that I couldn't use it. So I spent waaaaay too much time dyeing and over dyeing small pieces of white velvet to get the right color. Then, as it turned out, that original velvet embossed green so I decided to use all three greens. I am pleased with the results, another mixed media collage.
 I still have green fingers because my glove had a hole it it. I got most of it off with a wonderful product made just for that purpose, called Kresto. Got it online quite awhile ago, but can't remember where.

I am linking up with Off the Wall Friday


Friday, September 18, 2020

Finished Quilting and a Collage

 I had a pretty good week, productive wise. I finished quilting my Sun-print Plaid quilt. I wanted to quilt on my Sweet Sixteen, but that did not work out. I swear that I got a lemon with this machine. I purchased a Bobbin Case Tension Gauge for 50 bucks because I thought it would solve my problem. A friend swears by it. The gadget said to put the tension at 220, so I did and all I got was a big snarl of thread on the back. So I fiddled with it and ended up setting it at about 400. That seemed just fine for about 10 minutes and then the thread broke. Rethreaded it and I got terrible tension and puckering. I GAVE UP!  And I was using the thread that came with the SS, Superior Thread So Fine 50, on the top and in the bobbin. 

So back to my trusty Bernina, on which I have quilted many a quilt, and doesn't care what kind of thread I use. Since this quilt was only 42 inches wide, it was very easy to do. I quilted it block by block, working from the center to the side. I didn't roll the quilt at all, just bunched it lightly so there was do drag. I love doing this leaf patten, it was almost zen like. If you look closely you will see that the leaves are not all exactly the same, some a little fatter, some a little longer, but it all goes together and is part of the charm (or so I tell myself). Remember to click on each picture twice if you want to see the details.

I photographed it outside on my deck, hoping to get a truer color than I did in my studio.

True colors, pastel and pretty.


Not true color, but you can see the quilting.

I had to piece the backing, nothing fancy, just using what I had.


I like the way the quilting shows on the back.


Now I have to bind it and I'm not sure what to do. I can piece it with different plaids or maybe use a solid that will go with the plaid. I also have to find a recipient. Does anyone have a good charity to recommend?


Lastly is the collage I made for August. The theme was SUMMER. I used my usual "formula" with pages torn from the encyclopedia, dictionaries and online dictionary, which I enlarged. The sunflower is one of my photos and the sun was from my Sunday Morning Suns, both printed on tracing paper so that the words would show through. I also wanted to do a velvet embossed sun. I had no yellow velvet so I dyed a small piece  bright yellow and used a Hot Potato stamp that I had. I filled in the spaces between with a stamp that has script that is not really words and a sunflower stamp. Another mixed media  collage.

I am linking up with Off the Wall Friday.


Thursday, September 10, 2020

Sunprints and Plaids

 I've often said that I could make 100 quilts out of the fabric I have in my sash. It may be a slight exaggeration, but after 40+ years of quilting I have a LOT of fabric. Commercial prints purchased over the years, solids, batiks that I couldn't resist, hand dyed fabric, Dupioni silks, shobori, surface design, etc. Tubs under the guest room bed and tubs in the guest room closet. Floor to ceiling shelving units in my studio. Plastic drawer units under my work table. 

I am not inspired to make competition quilts lately, since most shows have gone online. Houston is cancelled this year for the first time....sigh... I admire people who are making donations quilts and I thought I would concentrate on that for awhile.

One of the smaller plastic drawers in the units under my big work table was labeled Leaf Prints. I surely hadn't opened this drawer in years. Inside were 28 of these little sun-prints that I had made in a workshop many years ago. I had a bigger drawer labeled Plaids and I thought they were a perfect fit for each other.


I used 24 of the prints with two of the pastel Madras plaids from the bin. The leaf prints measured 4 1/2 x 6 inches and I surrounded them with two inch strips, Log Cabin style to make blocks 10 1/2 x 12.  I had a hard time photographing this quilt. It is much lighter and brighter in person. The quilt measures 40" x 70", a long lap quilt or baby quilt. 


The colors on this block are pretty true. See what I mean by lighter and brighter? I made this extra block to see how I wanted to quilt it. I think I will do the leaves on the right hand side. I'm going to attempt to quilt it on my Sweet Sixteen, which will be a piece of cake if it cooperates. I always have trouble with the tension. I bought a new gadget called a Bobbin Case Tension Gauge, which I have not tried yet. My friend has one and she said it made all the difference in solving the tension problem. I certainly hope so. 


You may wonder why I had a whole box of plaid fabrics. Back in the 90's plaids were a trend for awhile. I've always like Madras plaids, maybe a hangover from college in the late 50's. (I'm old). I was chairperson of the annual challenge of my guild in 1998 and the theme was Mad About Plaid. I love this quilt that I made for the challenge. At that time I was making traditional quilts and hand quilting, which  was very good, if I do say so myself. I had small, even stitches, 10 to the inch. This was quilted with gray thread and the bias strips were also hand appliquéd. This is one of the quilts hanging in my studio and measures about 40" square.


These colors are true. It is in a different part of the studio and not affected by the light.


I am linking up with Off the Wall Friday. 

Saturday, September 5, 2020

Bisa Butler

 I was going to talk about several different things in this post, but when I looked through my pictures from the incredible show I attended this week I decided that this was worthy of my whole post. I'll write  some more about other things soon. 

I am very fortunate to live about a half hour from the Katonah Museum of art in Katonah, NY. It is a small museum without a permanent collection, so when they put on a show it is always just one artist or one genre. 

I am surprised that I had never heard of Bisa Butler. She is a youngish African American artist who works from black and white photos of African Americans from the 1800's and 1900's, some of them her relatives. She turns them into larger-than-life-size art quilts, using the most amazing fabrics and color combinations. We were just blown away. If you live anywhere near enough, please don't miss it. The show is on until October 4. You have to make a reservation and buy a ticket online. They were excellent about social distancing and mask wearing. I felt very safe.  

You can read about it on the website and also see some terrific videos. Here I will show you just a few to whet your appetite. 


This quilt was enormous, maybe the size of a king size quilt.


They showed the original photo that inspired this quilt. In it the boys were sitting on the hood of a car, wearing just ordinary suits and ties. 


It would be hard to pick a favorite, but this was one of them and it was one of the smaller pieces. Look at the colors she has used in the face!


I just loved the sassy look on this little  girls' face. This was also a smaller quilt compared with most of the others.


This was a group of African American college students sometimes in the late 1800's. In the photo they were sitting on the steps of the school. Next to each quilt was the story behind it.

She uses raw-edge appliqué and quilts them on a long arm. There was a video loop playing of her working in her studio.

For some reason, the new Blogger will not allow me to post these pictures any bigger, but if you click on the picture and then then click again, you can see more of the fabulous detail. Please do...you don't want to miss a thing. 

I'm linking up, a little late, with Off the Wall Friday.